


Introducing flying changes is an exciting and challenging milestone in your horse’s training. It requires precision, patience, and preparation to ensure your horse understands the aids and builds confidence in the movement. Here’s a step-by-step guide to help you teach your horse the flying changes.
Step 1: Establish the Basics
Before introducing flying changes, ensure your horse is confident with canter-walk-same lead canter transitions and simple changes. Practice these consistently, focusing on balance, rhythm, and relaxation. Your horse should also easily perform counter canter and respond clearly to picking up the designated lead by leg placement and flexion cues.
Step 2: Use a Shallow Loop Serpentine
A shallow loop serpentine is an excellent exercise to transition from simple changes to flying changes. Here’s how:
- Begin in canter on a shallow loop serpentine.
- Walk at the quarter line of the loop and pick up the canter on the opposite lead.
- Then repeat when you hit the quarter line again.
- Minimize the number of walk steps over the quarter line while maintaining balance and rhythm.
- Gradually prepare your horse for the new lead before the walk, using inside leg pressure and slight flexion.
This pattern familiarizes your horse with the sequence of aids for changing leads.
Step 3: Introduce the Flying Change
Once your horse understands the serpentine pattern:
- Canter off the rail into the loop.
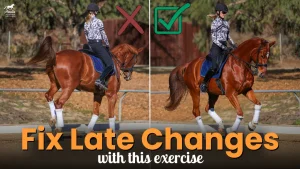
- Instead of walking, ask for the flying change by shifting leg aids (inside leg at the girth, outside leg behind the girth) and ensuring your horse is straight.
- Maintain forward momentum to give your horse the energy to “jump” into the change.
At first, your horse might jump forward or anticipate the change. Stay calm, reward their effort, and refine the movement over time.
Step 4: Address Anticipation
If your horse begins to anticipate the flying change:
- Return to simple changes within the serpentine pattern to re-establish control and clarity.
- Focus on keeping your horse relaxed and balanced during transitions.
Step 5: Work on One Lead at a Time
Start with the change to the lead your horse finds easier. Confirm this direction of a flying change before introducing the change to the more challenging side. This approach builds confidence and sets a strong foundation.
Key Tips for Success
- Patience is Key: Flying changes can take months (or years!) to perfect. Consistency and clear communication are essential.
- Focus on Straightness: Ensure your horse doesn’t lean or dive during the change.
- Reward Effort: Even if the change isn’t perfect, reward your horse to encourage their learning.
By mastering these steps, you’ll set your horse up for success with flying changes while maintaining a positive and progressive training experience.
Happy Riding!
Amelia