


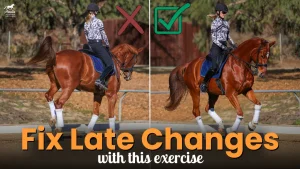


You might say that the piaffe is the pinnacle of Dressage. When you get it right, it really does feel like dancing on the spot; a powerful combination of collection and impulsion – a prancing unicorn. It can be tempting to just rush your horse into the piaffe, but this can create a lot of confusion, and may even cause your horse to rear, bolt, or spin. In reality, it takes years of practicing simple exercises to teach your horses the concepts they need to piaffe confidently.
So, in this week’s video, I wanted to show how I begin to teach my horses the piaffe on the ground. Introducing the piaffe on the ground is a great way to help set your horse up for success.
Psst… in case you missed it, be sure you check out my Free Piaffe Webinar for more tips on teaching your horse the piaffe! Watch the replay here.
Here is how I teach my horses to piaffe in hand:
· Go-stop-back up – The first thing that I teach my horses is to walk forward, stop, and back up on the ground. I call this “centering” as it really helps to balance out the forward and back buttons on your horse. For this exercise, your goal is to have your horse mirror your body language as you walk forward, stop, and back up. You should be able to do this without the slack coming out of your lead rope!
· Teach Leg Lifts – Next, you can begin teaching your horse to do leg lifts. This helps your horse understand what they should do with their hind legs in the piaffe. To teach the leg lifts, slide your whip down the hind leg and tap below the hock. When your horse lifts their leg, release the pressure. Your goal is to teach your horse to lift and hold both hind legs when they feel the tap of the whip below their hock.
· Accept the Contact on the Ground – After you have taught your horse the leg lifts, the next step is to teach your horse to accept the contact from the ground. Put the reins over your horse’s head, and take ahold of the inside and outside reins just like you would if you were riding. Practice asking your horse to walk forward into the contact and stopping with you to help get them comfortable with this idea on the ground.
· Teach Lateral Work from the Ground – Once your horse accepts the contact from the ground, the next step is to teach them to move laterally on the ground. Teach your horse movements like the leg-yield and the turn on the forehand to help them learn this concept and begin engaging their hind end.
· Put it all Together – Once you and your horse have mastered all these exercises, then you can put it all together! Take contact on the reins and ask your horse to move forward a little while giving little taps on the hind leg. Viola! Now you have the piaffe in hand!
This may seem easy, but as I mentioned before, it takes a long time to teach your horse the piaffe. Before we begin working on the piaffe, we have to have rhythm, suppleness, and connection, and it takes years to build the strength and all the pieces that we need for the piaffe. For example, I have been working on simple groundwork exercises with my horse Kensington since he was five, and he is now eight and just starting to really get the piaffe under saddle. So begin teaching your horse these basic concepts now, and pretty soon you will have a beautiful piaffe in hand!
Happy Riding!
Amelia
P.S. Want more help teaching your horse the piaffe and other movements like half pass, shoulder-in, and passage? Check out my Dressage Groundwork Masterclass!*
*Sorry! You’ve missed this course enrollment. Don’t worry thought! Click the link and put your name on the list to be notified the next time the course opens again. We would love to have you.